Showing posts with label cooking. Show all posts

Friday, April 23, 2010

Sushi Night

So I didn't quite make it to Japan (see my earlier post here), but I did get an opportunity this week to make my very own sushi.

My friend Julie put on an international student hang-out, and we all made sushi. It was a huge success (way to go Jules! thanks for being such a great hostess) and the sushi actually tasted like it does in the restaurant. Now I can save a ton of money, and be able to eat sushi when I move back in with my parents for a month since there is no sushi restaurant in my hometown.

Here are some pictures from our fun:

bamboo mats and seaweed

some Asian snacks :)

crab meat and rice for inside the sushi

cutting avocado

me with my sushi

me and some friends

LiuLiu with Oliver

Wednesday, March 24, 2010

Spaghetti and Meatballs

This recipe is courtesy of the Pioneer Woman, I was too lazy to take photos, so I 'borrowed' the final picture from her, and if you want more you can just visit here. These are probably the best spaghetti and meatballs I've ever had :)

TPW_7873

picture courtesy of the pioneer woman
Ingredients
  • Meatballs:
  • ¾ pounds Ground Beef
  • ¾ pounds Ground Pork
  • 3 cloves Garlic, Minced
  • ¾ cups Fine Bread Crumbs
  • 2 whole Eggs
  • ¾ cups Freshly Grated Parmesan
  • ¼ cups Flat-leaf Parsley, Minced
  • ¼ teaspoons Salt
  • Freshly Ground Black Pepper
  • Splash Of Milk
  • ½ cups Olive Oil
  • Sauce:
  • 1 whole Yellow Onion, Diced
  • 3 cloves Garlic, Minced
  • 1 whole (28-ounce) Can Whole Tomatoes
  • 1 whole 28 Ounce Can Crushed Tomatoes
  • ½ cups White Or Red Wine (optional)
  • ¼ teaspoons Salt
  • 1 teaspoon Sugar
  • Freshly Ground Black Pepper
  • ¼ cups Flat-leaf Parsley, Minced
  • 8 whole Fresh Basil Leaves, Chiffonade (optional)
  • 2 pounds Spaghetti, Cooked To Al Dente
Preparation Instructions

To make the meatballs, combine meat, garlic, breadcrumbs, Parmesan, eggs, salt, pepper, parsley, and a splash of milk in a mixing bowl. Mix together well with hands. Roll into 25 1 1/2-inch balls and place on a cookie sheet. Place cookie sheet into the freezer for 5 to 10 minutes to firm up.

To brown the meatballs, heat olive oil in a heavy pot or large skillet over medium-high heat. Add meatballs 8 at a time, turning to brown. Remove and drain on a paper towel after each batch. Set meatballs aside.

In the same pot, add the onions and garlic and cook for a few minutes, or until translucent. Pour in whole tomatoes, crushed tomatoes, and wine, if using. Add salt, pepper, sugar, and parsley. Stir to combine and cook over medium heat for 20 minutes.

Add meatballs to pot and stir in gently. Reduce heat to a simmer and cook for 30 minutes, stirring very gently a couple of times during the simmer.

Just before serving, stir in basil if using.

Serve over cooked spaghetti. Sprinkle with extra Parmesan.


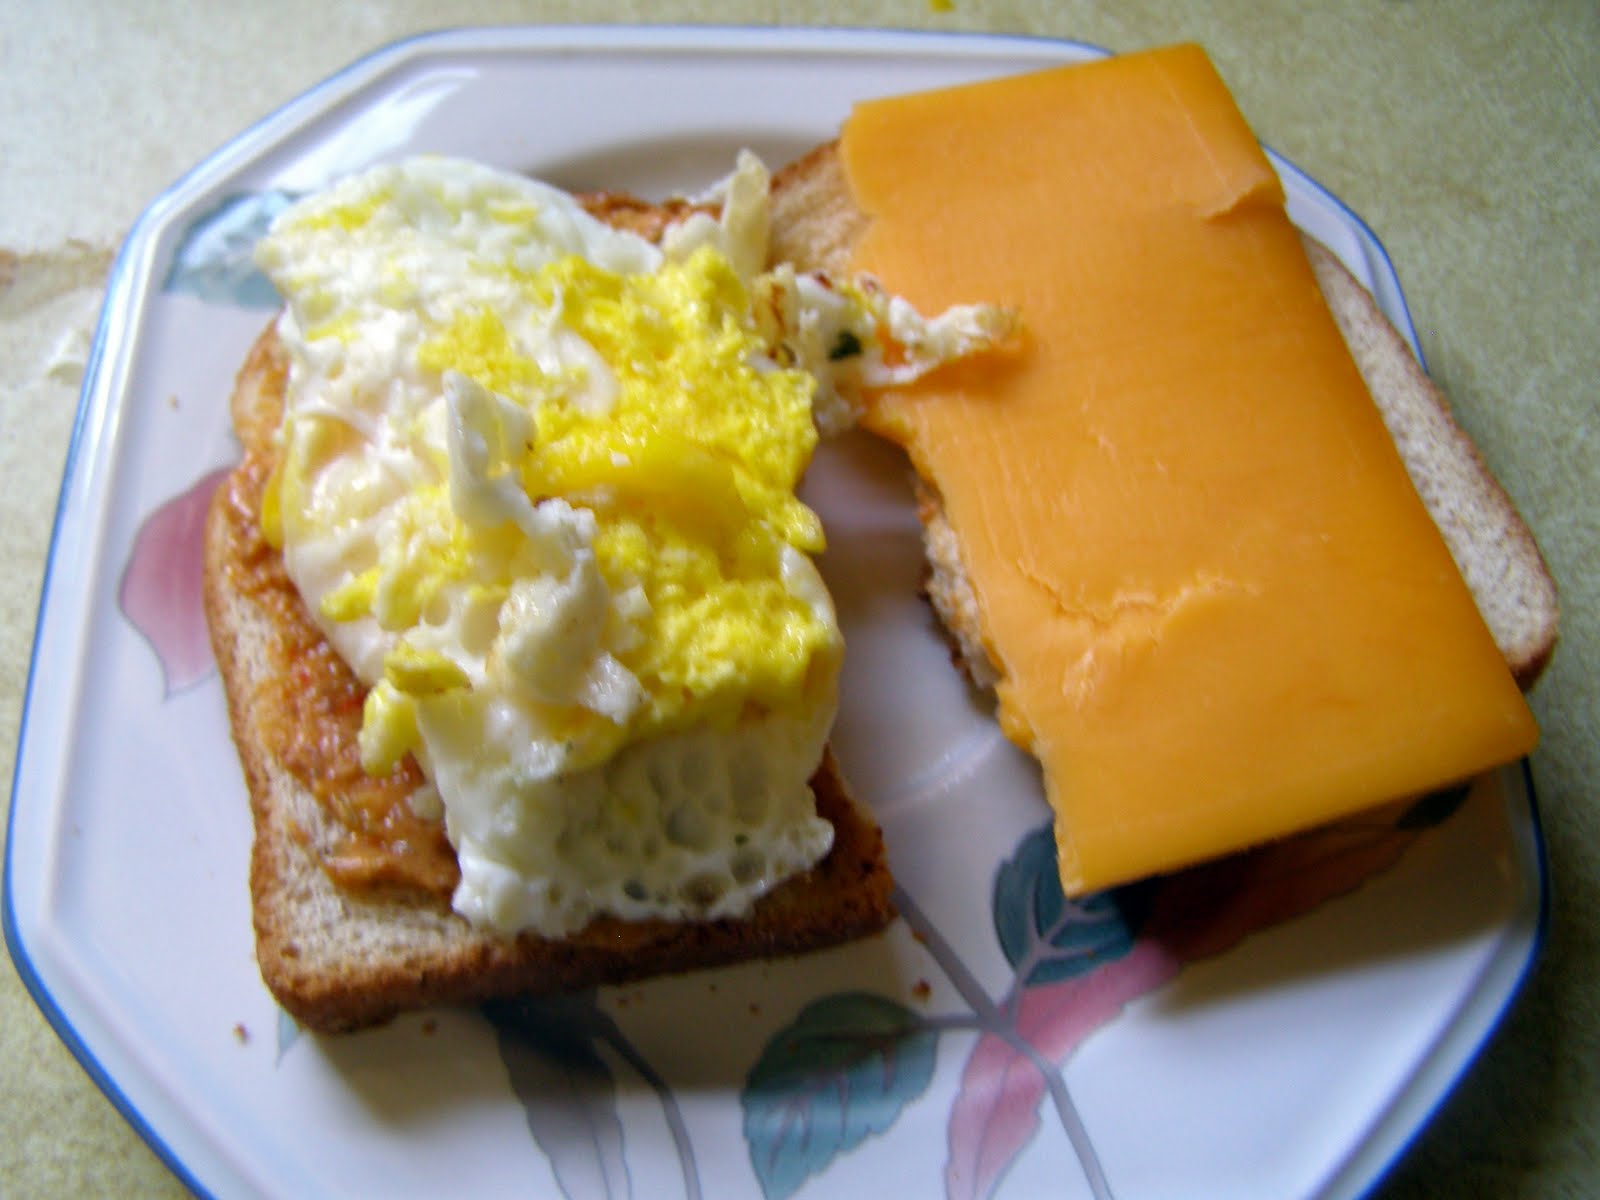
Fried Egg Sandwich

So I'm back! Mexico was awesome and I'll post about that as well, but I'm doing thing in order, so this comes first.

Ingredients:


1 Bread
1 Egg
1/2 slice of cheese
Chipolte Mustard
Ranch Seasoning
Butter

This is usually all I use for breakfast in the morning, but you can always use more if you'd like.

1. Melt some butter in a pan. After it's melted fry the egg (good luck not breaking the yolk, I always suck at this) and season with the ranch seasoning (just use however much you want/need).


2. Toast the bread with the cheese on it.
3. Spread some Chipolte Mustard on the bread.
4. Then after the egg is done cooking put it on the bread and eat it. Easy and delicious :)


Sunday, February 28, 2010

Homemade Pizza and Macaroni Casserole

Pizza

Ok, so fair warning. You need to make the pizza crust 24 hours in advance. I did not know this, and so we had to do some creative thinking to get the dough to rise fast enough for us to use it within an hour (but it still worked out great). We made two pizzas, one veggie and one with pepperoni (in order to appease Jessica and Chelsea who are apparently morally opposed to vegetables) and they both turned out great.

Ingredients
Crust (for 2 pizzas):
1 tsp of Active Dry or Instant Use
4 cups of flour
1 tsp salt
1/2 cup of olive oil

Toppings:
(we just used a random assortment of vegetables)
1 eggplant
grape tomatoes
minced garlic (two cloves)
2 green peppers
1/2 red onion
mushrooms
pepperoni
cheese
pizza sauce (we just bought this pre-made, making your own pizza sauce is probably not really worth the trouble)

Instructions
Yeast...apparently this stuff can be dangerous according to my roommate. I didn't ask questions, but just be careful...

we chopped...

and sliced...

and sauteed...


and broiled...

and listened/danced to michael jackson :)

the dough :) turned out well despite the issues

adding the toppings

pepperoni for the meat lovers

finished product(s)

Making the Crust:
Sprinkle yeast onto 1.5 cup of warm water.
In a bowl combine flour and salt. Then with a mixer (on low) mix in the olive oil.
Next pour in the water/yeast mixture and mix until combined (after this I ended up having to add some more flour because it was a little to soggy. If it sticks to your hands a lot when your kneading it, chances are you might need to add some flour).
Ok, now is the part where you wait...for 24 hours. Cover it with plastic wrap and stick it in the refrigerator. You can always wait longer (or even shorter, but that's when you have to get creative) if you prefer.

Making the Pizza:
First preheat the oven broiler.
Then, we cut up the eggplant (as thinly as you can) and tomatoes (length ways in half).
Place the eggplant into a strainer and sprinkle salt over it (make sure it's all coated) and let it sit for 20-30 minutes. Then rinse the eggplant off and put it along with the tomatoes on a cookie sheet, drizzled it with olive oil, add the minced garlic, and broil it. Do 3 minutes, then take it out, turn everything over, and do it for another 3 minutes on that side.

If you're good at multi tasking (or as in my case if you have help) you can simultaneously cut the onion, green pepper (both long ways) and the mushrooms (I bought the mushrooms pre-sliced...easier that way) and sautee them in a pan with some olive oil. I also added some Mrs. Dash spice to give it some flavor.

Pre-heat the oven to 500.

Then on a cookie sheet, spread out the dough (remember the crust makes two pizzas so divide it up and use two cookie sheets, or you can use some giant pan that probably exists somewhere out there but I don't own). Then add the sauce, and cheese on top (I just used HEB's Pizza cheese) and then the vegetables and pepperonis.

Bake for 10 - 12 minutes or until the crust is golden brown and then enjoy! We really loved it, especially us vegetable fans :)

Macaroni Casserole

Just to warn you, this is in no way, shape or form healthy and honestly there is probably no way to make it healthy. I did my best with using whole grain pasta and light sour cream but when you put this much cheese and butter into one dish, you just have to be prepared to not eat the next day to make up for it (or run it off, but not 30 minutes immediately following - more about that in the next post but let me just warn you it's a bad idea...). While it is not healthy it is one of the most delicious things you will ever eat and it's the way I was able to convince my roommates to all have dinner together.

Ingredients:

1 box of Kraft Macaroni (not the instant king but the kind you make on the stove) - you will also need the ingredients that go along with making this i.e. butter and milk
1 cup of sour cream
1 cup of cottage cheese
1 cup of (shredded) cheddar cheese
1 pkg. of ranch dressing mix
bread crumbs (optional) - and thanks to Sarah for the great idea :)

finishing up the macaroni

mixing everything together

baking
Pre-heat the oven to 350.
Then make the macaroni according to the box.
After that just mix the rest of the ingredients in with the macaroni.
Put it in a baking pan, sprinkle the bread crumbs on top and then put it into the oven to bake for 30 minutes.

Super easy but unfortunately I can't make it very often so that my roommates and I don't die a premature death...

Saturday, February 20, 2010

delicious hamburgers :)

Two cooking blogs in the same day! I've been kind of a slacker with cooking the past two weeks from being pretty busy (or at least real cooking that doesn't include baked goods), so I've been eating out a lot. But now that things have slowed down a bit (i.e. no more marathon training...) I'm back in the kitchen. While we were in Austin, we ate at a place called Elevation Burger, and all this week I was craving their hamburgers. Unfortunately they're only located in Austin (and soon to be Dallas), so I had to make some hamburgers myself. This was my first attempt at making my own hamburgers, and as Chelsea put it, "once again dominating in the kitchen."

1 lb of hamburger meat
1 egg
a package of ranch dressing mix
seasoned salt
garlic powder

First I put the hamburger meat in a bowl and mixed the egg in with it. We did this with the meat for the baozi and it turned out really well so I figured I would do the same thing with the hamburgers. Then I added about half of the ranch package and the other seasonings and cooked it in a pan (unfortunately I don't know how to use a grill). On my hamburger I put some chipolte mustard that I bought at HEB and it definitely added a little kick to it and was really good. I'm not a huge fan of mustard, and by that I actually mean I kind of hate it, but this didn't have that overwhelming mustard flavor so it was good.

Again, no pictures due to my missing camera/memory card :( but hamburgers aren't too different from each other so you're really not missing anything.

Carne Guisada

I love carne guisada. If a Mexican restaurant has it, I order it. The only problem is, is that there is a place in Lake Jackson that makes the best carne guisada I've ever had, and nothing has really ever measured up. I was having a craving this week, so I decided I would just try and make it myself. I have to say it was a great success. Sarah and Kristin loved it. Sarah even said it was better than Chuy's where we ate this past week in Austin (and Sarah judges how good a Mexican restaurant is based on their carne guisada, so when she said she loved it, I was quite proud). It was also super easy, because I used a crock pot, so if you need something that doesn't take a lot of effort, this is a good option. I apologize in advance for the lack of pictures but I can't seem to find my memory card, or my other camera, so I was out of luck (don't worry I'll go on a mad search tonight while I clean so hopefully I can have pictures up in future posts).

1 pot roast (I've used beef tips before, which is probably how it's usually made, but I thought I try something a little different)
1 can of carne guisada sauce from HEB (obviously I was feeling lazy and didn't feel like making the sauce myself - and for coming in a can, it was excellent)
potatoes - I used two small golden potatoes, but you can use more if you like, but I felt it was a good amount
Tony Sacharies spice
Seasoned Salt
Garlic Powder
1 Crock pot

Around 10 AM I put the roast in the crock pot and covered it in the spices. I don't have a measurement, I just added as much as I wanted. Then pour in the sauce and let it cook there all day. Around 6 I peeled and cut the potatoes and put it in the crock pot. I should have put them in earlier because they weren't as soft as I wanted, but they were still cooked when I took everything out at 7ish. Then put it in a tortilla and eat it! Like I said, easy and delicious.

Enjoy!

Thursday, February 11, 2010

Big Love Butterscotch Cookie

Recently I found this great website called bakerella.com. I was very excited when I found it because I love to bake. This cookie is definitely very good. I've already made it twice. Once for my Logos group and once just because. It doesn't take that long to make either, although it did take me longer to bake it than the recipe said. I probably ended up baking it closer to 15 minutes than 10. Enjoy!

mmm...Nestle Chocolate and Butterscoth chips :)

the rest of the ingredients (minus the crackers)

mix it all together

time to bake it :)

add the ganache and M&Ms and ta da!

Cookie
1 1/2 cups flour
1/2 teaspoon baking soda
1/2 teaspoon salt
1/2 cup butter, softened to room temperature
1/2 cup sugar
1/3 cup packed brown sugar
1 egg
1 teaspoon vanilla
1/2 cup butterscotch morsels

Ganache
3/4 cup heavy cream
1/4 cup butter
3/4 cup semi-sweet chocolate morsels

heart-shaped cookie pan (about 11 inches wide)
M&M’s

  • Preheat oven to 350 degrees.
  • Cover heart-shaped cookie pan with non-stick cooking spray.
  • For the cookies, whisk flour, baking soda and salt together in a medium bowl and set aside.
  • Cream the butter and the sugars using a mixer until fluffy.
  • Add egg and vanilla and mix until combined.
  • Stir in the butterscotch morsels.
  • Transfer cookie dough to the pan and spread out evely until the bottom of the pan is covered.
  • Bake for about 8-10 minutes.
  • Remove and cool.
  • While the cookie is baking, you can make the ganache.
  • Heat cream and butter in a saucepan until melted and remove before it starts to boil.
  • Place chocolate morsels in a small bowl and pour cream on top. Let sit for a few seconds and stir until completely incorporated and smooth.
  • Let cool and spread on top of cookie with an offset spatula.
  • To decorate like the photo, you’ll need 85 M&M’s (red or pink or whatever) for the letters. Place candies on the ganache, using the photo as a guide. Use extra M&M’s for the border.

P.S. the heart-shaped cookie pan is also conveniently made to fit one package of refrigerated cookie dough if you so desire. And, if you can’t find a cookie heart pan, just use a regular pan and spread the cookie dough out. Depending on the size of the pan, you may need to adjust your baking times.

Try and enjoy.

Wednesday, February 3, 2010

Creamy Garlic Shimp Alfredo

I'm definitely behind on a lot of blogging. So many things happened and then I was sick and all I did was lay around and watch tv/sleep and nothing else. But before I got sick I tried out a new recipe and it was really good. I like fettuccine a lot and shrimp so this recipe worked out really well. And it made way more than enough for 4. I forgot pictures, but maybe I'll take one the next time I eat some of the leftovers.

13 oz. fresh fettuccine (great idea, but I just used a bag from HEB)
1 tbsp evoo
1 onion, finely chopped
3 cloves garlic, crushed
13. oz tomatoes, seeded and chopped (I just used a can of diced tomatoes and drained it)
1/4 cup white wine
1 & 1/4 cups whipping cream
2 lbs. medium shrimp, peeled, deveined, and tails intact (I just used 1 lb because 2 seemed like a lot and shrimp isn't cheap)
1/4 cup loosely packed roughly chopped fresh basil (I was feeling lazy at the grocery store and decided that I would just use Italian seasoning that I already had at home, so I just added that in with the onions and stuff while it was cooking)

Cook the fettuccine in a large saucepan of rapidly boiling salted water until al dente. Drain, then return to the saucepan.

Heat the oil in a large frying pan over medium-high heat and cook the onion and garlic, stirring for 4-5 minutes or until the onion is soft. Add the tomatoes and wine and cook for 3 minutes before adding the cream. Bring to a biol, then reduce the heat to medium-low and simmer for 5 minutes or until the mixture slightly thickens. Stir in the shrimp then simmer for 3-4 minutes or until the shrimp turn pink and are curled and cooked through. Toss with the pasta, gently shir in the baisil, season, and serve immediately.

Serves 4

Tuesday, January 26, 2010

the best mashed potatoes ever

So, after I made my Chickpea Potato Curry, I had a lot of left over potatoes, and decided I needed to use them before they went bad. I found a recipe on Campbell's website for Ultra Creamy Mashed Potatoes and then searched through my cookbooks for something good to go along with it and found a Cajun Chicken with Corn Salsa recipe. I decided to forgo the corn salsa, since I don't like corn, and make the chicken with the mashed potatoes as a side. Let me just say that these are the best mashed potatoes ever. Seriously. Sarah's reaction was "whoa!" and Chelsea couldn't stop eating them. They were pretty amazing. I did a few things of my own, so keep an eye out for alterations. The chicken was good too and easy, which was good since mashed potatoes from scratch take a little longer than instant, but it does help to have a potato peeler (much quicker than trying to use a knife)!


Cajun Chicken:

1. Super easy! Just cover it with cajun seasoning. I used Tony Chachere's. Be careful if you can't handle spicy.
2. The recipe book that I have said to grill it, but since I have no idea how to grill and pretty sure Chelsea would kill me for using hers, and didn't want to take the time to mess with a charcoal grill even if I did know how to use it, I just cooked it in a pan with a little bit of olive oil.
3. That's it for the chicken. Like I said, super easy!


Mashed Potatoes (be careful because these are going to change your life!)

3 & 1/2 cups of swanson chicken broth
5 large potatoes cut into 1-in. pieces (I used gold/yellow potatoes because that's what I had left over. Since they are kinda small I ended up using 7 instead of 5).
1/2 cup of light cream (HEB didn't have light so I just used heavy, which might have been why they were so great)
2 tbsp butter
black pepper (however much you want)

1. Heat the broth and potatoes in a 3 qt. saucepan over medium-high heat to a boil. I also added two cloves of garlic and added some seasoned salt while it was heating up/cooking.
2. Reduce the heat to medium and cover for 10 minutes or until potatoes are tender. Drain, reserving the broth.
3. Mash (and I'm one of those people who doesn't like lumps in my mashed potatoes so I used an electric mixer) the potatoes (garlic and all) with 1/4 cup broth, cream, butter and pepper (and whatever spices you may want to add). Add additional broth if needed, until desired consistency.


Saturday, January 23, 2010

Sesame Coated Tuna with Cilantro Salsa

I just have to say this wasn't the favorite thing that I've cooked. It wasn't bad, but it was really just ok. It was really lacking flavor. The recipe didn't say to put any spices on it and I didn't think to put any on before I rolled the tuna in the sesame seeds. It was ok, but again not my favorite. Also, I decided that it would be much easier to just buy pico de gallo from HEB instead of making it myself because it's pretty much the same concept but easier and probably better. So here is the recipe and pictures :)

Sesame-coated tuna with cilantro salsa:

4 tuna steaks (I just did 2 because turns out these are a little pricey...)
3/4 cup sesame seeds
3 handfuls baby arugula leaves (I left these out and used spinach instead)

Cilantro salsa:
1 large clove garlic, crushed
2 tomatoes, seeded and diced
2 tbsp. finely chopped fresh cilantro leaves
2 tbsp. extra virgin olive oil, plus extra for frying
1 tbsp. lime juice

Cut each tuna steak into three pieces. Place the sesame seeds on a sheet of baking paper. Roll the tuna in the sesame seeds to coat. Refrigerate for 15 minutes.

To make the salsa, place the garlic tomatoes, cilantro, oil, and lime juice in a bowl and mix together well. Refrigerate until ready to use.

Fill a heavy-bottomed frying pan to 1/2 in. (I didn't use that much) with the extra olive oil and place over high heat. (Be very careful, oil fights back and it got me on my eye-lid. Talk about painful.) Add the tuna in two patches and cook for 2 minutes each side (it should be pink in the center). Remove and drain on paper towels. To serve divide the arugula (or spinach in this case) among four serving plates and arrange the tuna over the top. Spoon the salsa on the side and serve immediately.

finished product

cilantro salsa

sesame coated tuna

Tuesday, January 19, 2010

Tilapia with Mango Salsa

So I forgot to take pictures (sorry in advance). It was great. 2nd time was just as good as the first, but not as much food this time. Here is there recipe, but keep looking because I changed up some things that made it much easier, so if you're in a hurry and don't have time to make the salsa and marinade yourself it will be quicker.

Grilled Tilapia with Mango Salsa

Ingredients

· 1/3 cup extra-virgin olive oil

· 1 tablespoon lemon juice

· 1 tablespoon minced fresh parsley

· 1 clove garlic, minced

· 1 teaspoon dried basil

· 1 teaspoon ground black pepper

· 1/2 teaspoon salt

· 2 (6 ounce) tilapia fillets

Salsa

· 1 large ripe mango, peeled, pitted and diced

· 1/2 red bell pepper, diced

· 2 tablespoons minced red onion

· 1 tablespoon chopped fresh cilantro

· 1 jalapeno pepper, seeded and minced

· 2 tablespoons lime juice

· 1 tablespoon lemon juice

· salt and pepper to taste

Directions

1. Whisk together the extra-virgin olive oil, 1 tablespoon lemon juice, parsley, garlic, basil, 1 teaspoon pepper, and 1/2 teaspoon salt in a bowl and pour into a resealable plastic bag. Add the tilapia fillets, coat with the marinade, squeeze out excess air, and seal the bag. Marinate in the refrigerator for 1 hour.

2. Prepare the mango salsa by combining the mango, red bell pepper, red onion, cilantro, and jalapeno pepper in a bowl. Add the lime juice and 1 tablespoon of lemon juice, and toss well. Season to taste with salt and pepper, and refrigerate until ready to serve.

3. Preheat an outdoor grill for medium-high heat, and lightly oil grate.

4. Remove the tilapia from the marinade, and shake off excess. Discard the remaining marinade. Grill the fillets until the fish is no longer translucent in the center, and flakes easily with a fork, 3 to 4 minutes per side, depending on the thickness of the fillets. Serve the tilapia topped with mango salsa.


So here's what I did differently.

1. I didn't make my own marinade. I just bought a lemon pepper marinade from HEB. I marinated it for about 2 hours. I also just used Mrs. Dash Table Blend spice to add some more flavor.

2. I also didn't make my own salsa (so basically I didn't really do anything to make this except cook it).

3. I also didn't grill it. We have a grill but I don't really know what I'm doing when it comes to that kind of stuff. What I did was I cook it in a pan (I just sprayed some off brand Pam to keep it from sticking). Then after it was done cooking I threw the salsa in to let it simmer for a while while I cooked some green beans (which were great). I just sautéed them in some olive oil and some butter and threw some garlic powder, seasoned salt, tony sacheries and added some Louisiana hot sauce so it would be spicy. I really liked it and it was quick and easy so I'll definitely make it again.


Monday, January 11, 2010

Just call me Betty Crocker (or Paula Dean; either is fine)

Yes, that is the title of my blog. Here’s why. So as I posted in my last blog, two of my New Year’s resolutions are: 1) to eat out less and cook more, and 2) to blog more often. In order to accomplish this whole blogging thing, I needed an idea, and in order to eat out less, I needed a reason (other than the fact that my bank account would really appreciate it). So I stole the concept of Julie and Julia and decided to combine these two resolutions into one. Now, not all of my blog is going to be about my cooking, but I feel like this is an easy and fun way to help me keep up with these two things. So my goal is to, once a week, cook something new and blog about it (i.e. how I made it, how it was, etc.)!

So tonight, I went to the store, bought everything I needed, and embarked on my new assignment. It was a great success (hence the title). Julie came over to test it out and gave it two thumbs up. I was very surprised that it came out so well since it was something I’ve never done before, and I have a ton of leftovers. Here’s what I made:

Chickpea Potato Curry Recipe

INGREDIENT

2 1/2 cups vegetable broth
Two 15-ounce cans chickpeas (garbanzo beans), drained and rinsed

One 14 1/2-ounce can fire-roasted or stewed tomatoes with chiles (See Muir Glenhttp://www.assoc-amazon.com/e/ir?t=elisecom&l=as2&o=1&a=B000LKVH8S. If you can't find canned tomatoes with chiles you can add half a 4-ounce can of diced green anaheim chiles to a 14.5 ounce can of tomatoes.)

6 baby (new) Yukon Gold potatoes (about 12 ounces), quartered

1 medium onion, diced (about 1 cup)

1 Tbsp unsalted butter

2 teaspoons minced ginger

1-2 teaspoons salt

1 teaspoon ground cumin

1 teaspoon ground coriander
1/2 teaspoon cayenne pepper

METHOD

1 In a large pot, combine the broth, chickpeas, tomatoes, potatoes, onion, butter, ginger, 1 teaspoon of salt, cumin, coriander, and cayenne. Stir to mix and nestle the potatoes into the liquid.

2 Set the pot, uncovered, over medium heat. Simmer vigorously for about 35 minutes, or until the potatoes are tender. Add more salt to taste. Serve the curry in bowls over Jasmine rice.

It was great. I was inspired by the Indian food that Julie, Erin and I ate last week, and thankfully this was less spicy and I was able to eat it without it bringing me to tears or dying for more water. It was absolutely perfect and very easy. It took me about 10-15 minutes to prepare everything so it was super fast and convenient for a busy college student. So if you’re looking for a new recipe, this one is a good one.